Showing posts with label backup DVD. Show all posts

Monday, April 17, 2017

Backup Hundreds of Blu-ray and DVD Movies to Cloud Storage

As Internet lines become faster and servers more affordable, online cloud storage is not a sweet concept any more but a modern service you can really count on when backing up your hundreds of Blu-ray and DVD movies. So, this article will show how to backup hundreds of Blu-ray and DVD movies to cloud storage.

Part One: Best Cloud Storage in 2017 to Store Blu-ray and DVD Movies

Online storage is an integral part of life now, but with so many available it's hard to decide which one to use. So, firstly I want to recommend you the top 3 cloud storage for you to choose.


1. JustCloud

JustCloud use a small desktop application where customers can backup all of their files onto the cloud. They also have free apps for iPhone, iPad, Android, Blackberry, Kindle and Windows so you can backup and access files from any device. If you have rare family photos which you would not want to be accidentally deleted or a music library which took you years to collect and organize, then you should definitely think about getting the services of JustCloud.


2. ZipCloud

ZipCloud is just one of the many online backup services providers available on the Internet today. When you take advantage of their service, you will have a simple, safe and secure way of backing up your data. The founders of ZipCloud are Dan Richards and Brooke Bryan. Since the company’s inception, they have consistently been included among the top ten lists of the best online backup sites. Read on to find out more about the features, security, support and overall rating of ZipCloud as an online backup site.

3. SugarSync

SugarSync has their headquarters based in San Mateo, California and they currently have millions of subscribers around the world. The thrust of their campaign is to allow you to use a service which helps you “sync your life”. By simply downloading the software on your computer and mobile devices, you can gain access to everything that the cloud has to offer.


Part Two: How to Backup Hundreds of Blu-ray and DVD Movies to Cloud Storage

So, after knowing which cloud storage to choose, the next important thing you should know is how to backup hundreds of Blu-ray and DVD movies to cloud storage.

Here, I suggest you to use Pavtube BDMagic to rip and convert Blu-ray and DVD to regular video formats for storage on Cloud Storage,  like MP4, MOV, MKV, FLV, WMV, AVI format etc. Considering the limited space of normal cloud storage, the program allows you to lower converted video size by adjusting video parameters. Also considering to the final usage of your converted Blu-ray and DVD movies, the app provides optimized video presets formats for mainstream devices to let your get videos with the best settings to fit your device. Furthermore, the built-in video editor allows you to easily get desired video part and effects. (Review)

For Mac user, you can turn to Pavtube BDMagic for Mac for downloading. The program has updated to support the newest Mac OS X El Capitan.

Free download and install: 


Other Download:
- Pavtube old official address: http://www.pavtube.cn/blu-ray-ripper/
- Cnet Download: http://download.cnet.com/Pavtube-BDMagic/3000-7970_4-75922877.html

Steps to Backup Hundreds of Blu-ray and DVD Movies to Cloud Storage

Step 1. Load DVD/Blu-ray movies

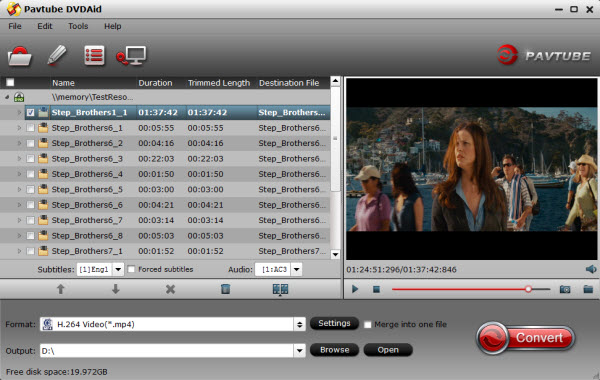
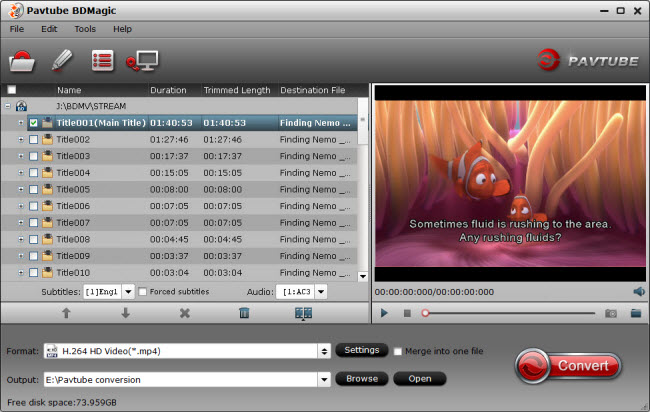
Click “File” to load your Blu-ray/DVD movie to this program. It will automatically choose the main content to convert. If there are several language subtitles in your Blu-ray/DVD movies, you can select the language subtitle you want to show in your movie by “Subtitle”.


Step 2: Set output format

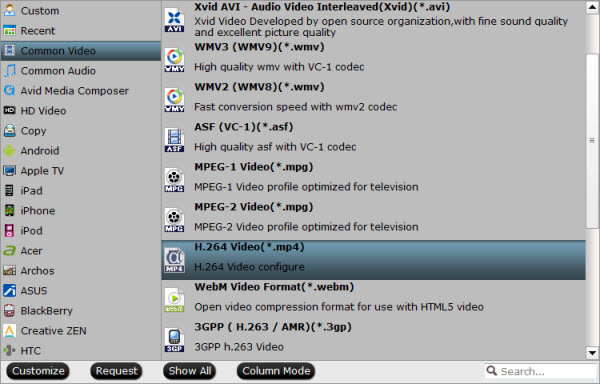
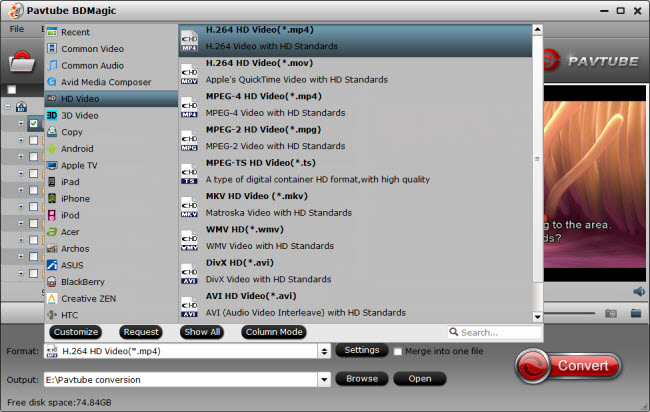
In drop-down format list, you can choose the optimized preset format for your final device. If you have not decided the final usage of your converted video, you can choose “HD Video” > “H.264 HD Video(*.mp4)” as output format for playing on laptops, tablets, mobile phones etc. 


Tips:

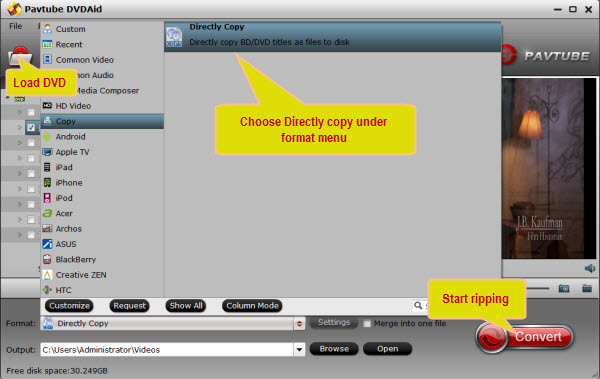
1. If you just want to digital your Blu-ray/DVD for more convenient organization and management, you also can choose tofull disc copy Blu-ray/DVD or main title copy.

2. Click “Settings” on the interface and you can adjust the parameters including size, bitrate, frame rate, etc. to get a high quality of output files or a smaller files size. Keep in mind the file size and video quality is based more on bitrate than resolution which means bitrate higher results in big file size, and lower visible quality loss, and vice versa. You can preview the size at the below chart.

Step 3: Start to convert

After all settings done, hit on the “Convert” button and Blu-ray/DVD to cloud storage conversion will start. After the conversion completes, open output folder and you will find the converted movies.

Now, you can backup your hundred of converted Blu-ray and DVD movies to cloud storage now. In addition to Cloud Storage, you can also backup Blu-ray and DVD to Media PlayeriTunes library or External Hard Drive/Thumb Drive etc.

Related Articles:

Backup Blu-ray/DVD for Amazon Cloud Drive

Backup DVD and Blu-ray collections to home server

 Backup 2D/3D Blu-ray Movies on Mac El Capitan

Backup Blu-ray/DVD for My Passport Wireless Storage

Backup Blu-ray to H.265 HEVC MP4 on Mac OS X

Backup Blu-ray/DVD/ISO to Surface Book
Back Up DVD Collection with Mac

Lossless Blu-ray to MKV Backup

Monday, December 19, 2016

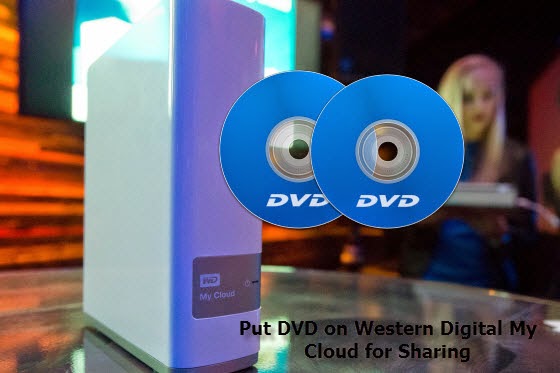
Convert DVD on Western Digital My Cloud for Sharing

An easy workaround for copying DVD to Western Digital My Cloud for streaming by ripping DVD to Western Digital My Cloud friendly video format. 


WD My Cloud is a fast, easy-to-use NAS server for your home that includes an excellent personal cloud function. It has a USB 3.0 port for storage extension or backing up data. When you have collected lots of DVD movies, are you planning to backup these DVDs to 
a video file while keeping its audio and video effect unchanged? This disambiguation article will give you the effective way to put and rip DVD movies onto your WD My Cloud for sharing and streaming with ease. 

Although WD My Cloud can support a wide range of format like MP4, MOV, AV, due to the reason of lacking DVD drive, WD My Cloud can not meet the demands of put DVD discs online. To achieve this goal, an easy-to-use DVD Converter is the key. Pavtube DVDAid is such a wise choice for you to solve the problem. Read the Top DVD Ripper review for WD My Cloud

You can rip and convert DVD to WD My Cloud with super fast conversion speed and excellent image and sound quality. It is capable of ripping DVD to MP4, AVI, MKV for NAS streaming with no quality loss; you can easily backup your DVD disk with whole content copy or backup main movie only. If you are running on Mac OS X, turn to Pavtube DVDAid for Mac. If you haven’t got the software, download it now and let’s start the conversion. 
Free Download this Top DVD Ripper for WD My Cloud: 


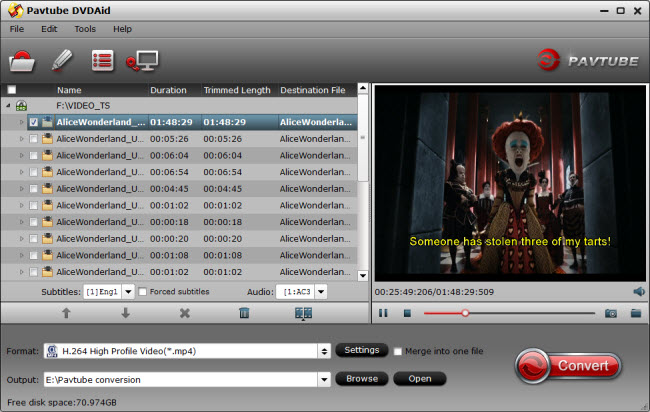
Step 1: Launch the DVD ripping program for WD My Cloud. Then click "Load DVD" to import the DVD files you want to convert. To select the subtitles you like, simply click Subtitle and select the one you prefer. 


Tip 1: Before start converting DVD movies, you can backup your DVD contend first with its full disc copy or directly copy features. 


Step 2: As My Cloud is powerful enough to almost all kinds of formats, you can choose the format according to your own needs like MP4, MOV, AVI, MKV, etc. 


Tip 2: You can click settings button to customize the output parameters, such as resolution, bitrate, etc, you can also skip this step. 

Step 3: After all settings, click convert button to rip/convert DVD to optimized format for WD My Cloud. Once you've liberated your DVD movie library, you'll make it available for viewing anytime, anywhere just with the help of your WD My Cloud. 

After all, you can enjoy your DVD movies from WD My Cloud on your Samsung smart TViPad Air 2iPhone 6/6 Plus etc and any portable devices as you want. 

Read More: 

Source: http://techmovieshare.blogspot.com/2015/03/rip-dvd-to-wd-my-cloud.html

Monday, September 19, 2016

Ripping DVD on Gear VR with 3D SBS

DVD on Gear VR with 3D SBSDo you heard of Gear VR and got a new one yet? Usually Samsung’s Gear VR can work brilliant for us. It’s easy for users to play their own videos/movies using the Oculus Cinema. Have an extensive collection of DVDs, but face the problem: how to rip and convert DVD to MP4 Side-by-Side 3D Video for playback on Gear VR (Oculus Cinema)? If you want to convert DVD to 3D video, so as to play, share your DVD movies more conveniently, now just follow this article to finish the conversion while reserving the original 3D effect and video quality. (Learn Differences Between Anaglyph 3D and SBS 3D). 


Samsung Gear VR by default supports most common file formats including MKV, MP4, AVI, and FLV. When it comes to playing 3D videos, Samsung Gear VR requires either side-by-side or top-to-bottom (top down), but most DVD are in the "frame packed" format. So the workaround is to download professional DVD ripping tool to rip the DVDs to Gear VR compatible videos so that you can enjoy your DVD movies in Gear VR with Oculus Cinema more conveniently. 

Here, we recommend you a top DVD Ripper for Gear VR - Pavtube DVDAid. With it, you can effortlessly rip your favorite DVD movie from DVD disc and output MP4 videos supported by Samsung Gear VR Unit/Innovator Edition with best quality easily. If you're using a Mac, please turn to Pavtube DVDAid for Mac, which allows you to convert DVD to Samsung Gear VR on Mac OS X (Yosemite and Mavericks included). 

Now download the right version according to your situation and check out the steps below. 


(Now, you can get 30% OFF discount after liked our FaceBook.) 

Convert DVD movies to watch in Gear VR from Galaxy Note 4 

Step 1. Import DVD movies 

Insert the DVD disc into your DVD drive and launch the Gear VR DVD ripper. Click "Load DVD" to select and import the DVD movies you want to rip for Gear VR. ISO and IFO files are also supported. 


Step 2. Select Gear VR preferred format 

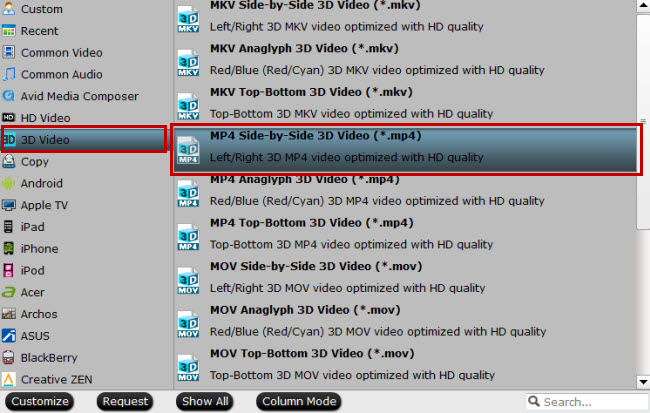
Click the "Format" bar to choose the output format for Galaxy Note 4 and Gear VR. Find "3D Video" catalogue, you will find several presets for Side-by-Side 3D, Top-Bottom 3D and Anaglyph 3D. You can choose the one according to your device specification. SBS MP4/MKV is usually the recommended one which is perfect for Gear VR. Then click "Settings" to adjust video codec, bit rate, frame rate, etc. if necessary. You can also rip DVD to Galaxy S6/S6 Edge in Gear VR. 

 
Tip- Profile Settings 

lick the "Settings" icon and you will go into interface named "Settings". You can adjust codec, aspect ratio, bitrate, frame rate, sample rate and audio channel as you like. For ripping DVD to view on Gear VR, 2D videos for the Cinema app should be in 720p (1280*720) with a higher bitrate around 5mbit/s. 

Step 3. Start to convert DVD to Gear VR 

Now go to the last step: click "Convert" to begin ripping DVD to 3D SBS MP4/MKV video files. After the conversion, you can tap "Open" to locate the converted videos immediately. Then connect your Note 4 to computer and transfer the video files to your device for enjoyment on the go. Also learn how to set up Gear VR

More Tips: 

Source:http://movie-tips-review.blogspot.com/2015/05/rip-dvd-to-gear-vr-in-oculus-cinema.html